Get Quote
Home > News > Fan Knowledge Sharing > DC Axial Fan Spare Parts Replacement
DC Axial Fan Spare Parts Replacement

DC Axial Fan Spare Parts Replacement

AUTHOR
Senior HVAC & EC Fan Applications Engineer· Published: OCTOBER 09, 2026

When a DC axial fan fails, most people do one of two things: they either throw the whole fan away, or they buy the first replacement they find online. Both approaches miss the middle ground. Plenty of small fans can be brought back to life with the right part, and plenty of "replacement parts" are a waste of money because the fan itself is the problem [1].

This guide is about making that call correctly. It covers which parts are actually serviceable on a small DC axial fan, what the swap costs in time and money, the compatibility traps that ruin otherwise good replacements, and a step-by-step procedure for doing the job without damaging the motor or the enclosure around it. The same structured, fault-first thinking behind IEEE motor testing standards applies here, just scaled down to a fan you can hold in one hand [3].

What Breaks, and What You Can Actually Replace

DC Axial Fan Replacement Parts

Figure 1: Repair vs. replace decision matrix. Minor faults on young fans are worth repairing; major faults or old fans almost always point to a full fan replacement.


Field return data from fan manufacturers tells a clear story about why small DC axial fans come back: bearing wear, dust loading, cable damage, and connector corrosion, in that order. Motor windings almost never fail first [1]. That is good news, because most of those failure points sit outside the sealed motor and are physically replaceable.

Realistically replaceable parts:

  • Bearings — sleeve bearings on 60-80 mm fans, ball bearings on 92-172 mm fans
  • Impeller / blade assembly — when the motor hub is still healthy
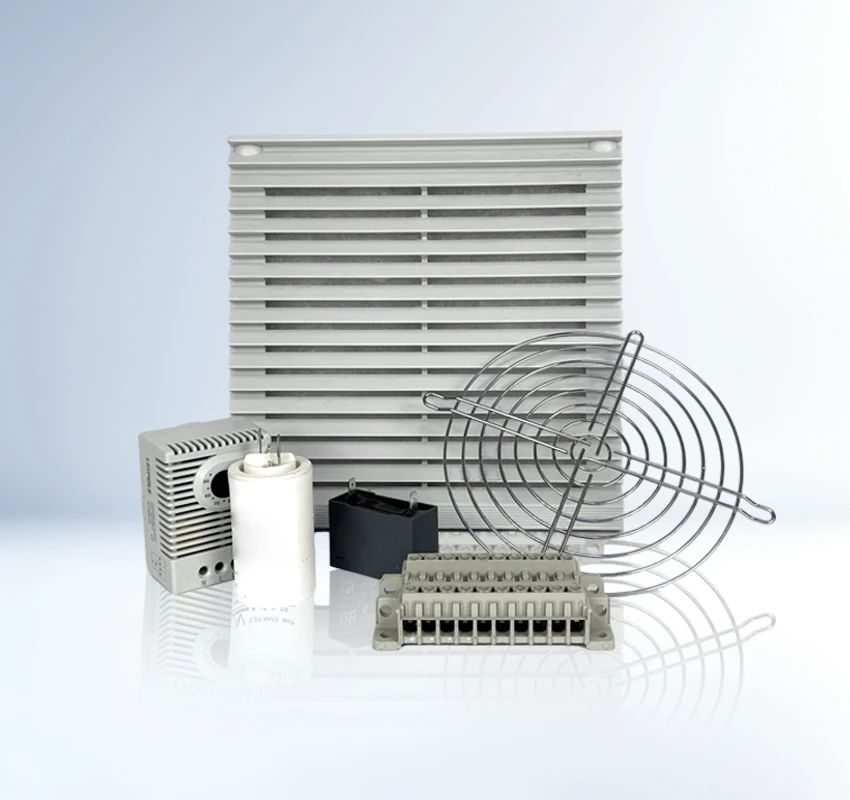
  • Finger guards and grilles — cheap, always available, frequently damaged in transit
  • Cables and connectors — broken leads, corroded pins, or a melted connector shell
  • Mounting hardware — screws, grommets, and vibration isolators

Things you should not try to replace:

  • The driver / controller PCB — for fans under 120 mm, the PCB is glued into the hub and rarely sold separately
  • The stator windings — magnet wire repair on a fan this size is a school project, not a field repair [3]
  • The rotor magnet ring — demagnetized rings are not serviceable

The rule of thumb: if the part costs less than a third of a new fan and takes less than ten minutes to fit, replace the part. Everything else points to a new fan. Figure 1 turns that rule into a quick decision matrix you can use on the bench.

The Economics: When Replacement Parts Make Sense

DC Axial Fan Replacement Parts

Figure 2: Typical part and labor costs for DC axial fan service. For compact fans, the complete fan often costs less than the labor-only cost of a bearing swap.

Let us talk money, because that is what really decides whether you repair or replace. A 60 mm fan sells for a few dollars; a set of two ball bearings for a 120 mm fan also costs a few dollars. The difference is not the part price - it is the labor, the tools, and the risk of doing the job wrong [6].

Bearing replacement on a 120 mm fan is a legitimate job: remove the retaining ring, press out the old bearing, press in the new one, re-lubricate, and re-test. It takes about twenty minutes of careful work and is worth it when the fan itself is expensive, hard to source, or part of a matched pair. On a 40 mm or 60 mm fan, the same job is fiddly, the bearings are cheap, and a new fan costs less than your time - so replacing the fan is the rational call [1] [6].

The same logic applies to "while I am in there" work. If you are already fixing a connector, replacing the cable at the same time costs almost nothing and removes a known weak point. Energy Star guidance for electronics cooling makes the same point from the other direction: a fan running on a worn bearing draws more current and moves less air, so the efficiency loss alone can justify the swap [8].

Bearing Replacement: Sleeve vs. Ball

DC Axial Fan Replacement Parts

Figure 3: Sleeve bearings are cheaper and quieter when new but wear out sooner; ball bearings last far longer and are the ones worth replacing in the field.

Bearings are the most replaced part in the DC axial fan world, and the bearing type decides whether a replacement makes sense at all [7].
Sleeve bearings (typically 40-92 mm fans):

Sleeve bearings spin the shaft in a porous bronze bushing that holds oil. They are quiet when new and cheap to build, which is why so many budget fans use them. Their weakness is lifespan: once the oil migrates or dries out, the bushing squeals, then scores, then seizes.

 Replacing a worn sleeve bearing is technically possible, but the new bushing will be fighting the same worn shaft, and the fan housing is usually riveted shut at this size. For practical purposes, a seized sleeve-bearing fan is a replacement fan [7].

Ball bearings (typically 92-172 mm fans):

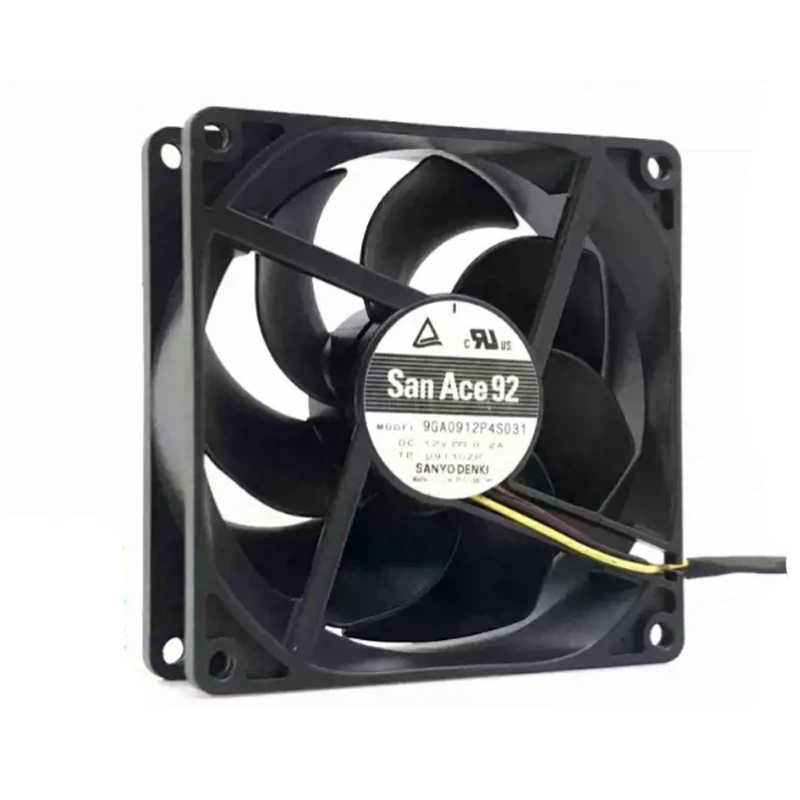
Ball bearings last two to three times longer than sleeve bearings and fail more predictably. That predictability is what makes field replacement worthwhile. On a 120 mm or larger fan, you can press the old bearing out and a new one in, and the fan gets a genuine second life. Sanyo Denki publishes detailed dimensional and life data for its fan bearings, which is exactly what you need when ordering a drop-in replacement rather than a "close enough" substitute [2].

Order the right bearing:

  • Note the inner diameter (shaft), outer diameter, and width - e.g. 608ZZ is 8x22x7 mm
  • Pick the same shield/seal type (ZZ metal shields or 2RS rubber seals)
  • Match ABEC class if the fan runs at high speed; standard 60-120 mm fans use ABEC 3 or 5
  • Buy from a known bearing brand - cheap bearings are the number one cause of "replacement" failures [2]

Impellers, Guards, and Grilles

The impeller is the most visible and most commonly damaged fan part. Cracked blades, chipped leading edges, and warped hubs all come from shipping damage, accidental drops, or foreign objects getting pulled in. Because the impeller is a precision-balanced part, any damage that unbalances it destroys the fan eventually, even if the motor is fine [4].

Some manufacturers sell impeller assemblies separately, usually for 120 mm and larger fans. The swap is simple: pull the impeller off the shaft - usually with a small two-arm puller or careful prying - and push the new one on until the hub sits flush against the motor face, then tighten any set screw. Two cautions: never hammer the impeller onto the shaft, and never reinstall a damaged impeller, because the vibration will take the fresh bearings out with it [4].

Finger guards and grilles are the fan world equivalent of a spare tire: cheap, easy to fit, and absurdly common to lose or damage. Frame size and hole spacing must match, and the guard should not sit so close to the blades that it whistles or restricts airflow. AMCA-rated airflow figures assume a clean, unobstructed intake, and a crushed

 guard can quietly erase ten percent of your airflow without anyone noticing [4].

Cables, Connectors, and Speed-Signal Parts

Cable and connector damage is the most underrated failure mode in small fans, because it presents as a fan that is "dead" when the motor is perfectly healthy. Leads get pinched between the fan and the chassis, pulled at the strain relief, or chewed by anything that rubs against them inside the enclosure [1].

The fix ranges from a splice to a full lead replacement. For a simple splice, use heat-shrink tubing and solder - crimp splices alone work in a pinch but fail under vibration, which is a fan's whole job. For a full cable replacement, cut the old leads back to the PCB, solder on new UL-rated wire of the same gauge, and secure the joint with a dab of hot-melt adhesive. Keep the lead length close to the original so the fan still routes cleanly [1].

Connector problems deserve their own warning. A corroded or loose connector causes intermittent stalls that are maddening to diagnose, and re-terminating a connector is often the whole repair. Standard PWM and tach pinouts exist, but every manufacturer colors their leads a little differently, so verify the pinout against the datasheet before you re-crimp. Getting the tach and PWM lines swapped turns a simple repair into a dead controller in seconds - IEEE diagnostic practice is explicit about checking signal integrity before concluding the device is broken [3].

The Compatibility Checklist

DC Axial Fan Replacement Parts

Figure 4: A replacement part or fan has to match on eight dimensions. Frame size and mounting pitch are the ones people most often get wrong.

Half of all failed fan replacements are failed compatibility checks, not failed parts. A bearing that is 0.5 mm too small in the outer diameter, a connector with the right shell but the wrong keying, a fan that fits the hole but pulls more current than the board can feed - each one looks fine until you power it up [2].

Work through this list before ordering anything:

  • Frame size - the nominal size describes the mounting square, not the blade diameter
  • Voltage - a 12V fan on a 5V rail turns into a very expensive paperweight
  • Current draw - make sure the connector and the board can feed it
  • Connector type and pinout - shell shape plus lead colors and signal assignment
  • Speed signals - tach output logic level and PWM input range must match the controller
  • Bearing type - same as original unless you have a reason to change it
  • Airflow and pressure - equal or better at the operating point, not just at max speedMounting pitch - the hole pattern, not the nominal size, is what actually fits [5]

ASHRAE's ventilation guidance makes a broader point that applies here: cooling components are chosen as a system, not in isolation. If you upgrade airflow you may also need to check filter capacity, noise limits, and thermal control logic. The best replacement fan is the one that slots into the system without making you redesign the rest of it [5].

Seven-Step Replacement Procedure

DC Axial Fan Replacement Parts

Figure 5: A disciplined seven-step workflow keeps the replacement job at about 38 minutes and prevents the classic "replaced the part, broke the board" sequence.

Whether you are swapping a bearing, an impeller, or the whole fan, run the same disciplined sequence. It takes about 38 minutes start to finish and it is the difference between a clean repair and a bricked enclosure [5] [6].

Step 1 - Identify (4 min): note the model, frame size, voltage, and bearing type from the label.
Step 2 - Order the exact part (3 min): if any dimension on the checklist is uncertain, measure with calipers before ordering.
Step 3 - Power off and disconnect (2 min): unplug the fan at the connector, never by tugging the cable.
Step 4 - Remove the old unit (6 min): take out the mount screws, then remove the guard and impeller where needed.
Step 5 - Compare and prepare (5 min): lay the new part next to the old one and verify every compatibility box.
Step 6 - Install and route (8 min): fit the part, route the cable away from blades and hot surfaces, and refit the guard.
Step 7 - Power up and test (10 min): listen for noise, check speed signal, and confirm airflow direction before closing the enclosure [3] [6].

The test step deserves more respect than it usually gets. Let the fan run at full speed for a few minutes and then re-check: a bearing that is slightly off-axis, an impeller that is not seated, or a guard that vibrates will announce itself within minutes. Checking airflow direction matters too - reversed rotation on a single-phase BLDC fan is not always impossible, and a system running backwards will overheat for weeks before anyone notices [4].

Summary

DC axial fan replacement parts exist, they are affordable, and they are worth using - but only in the right situations. Bearings on larger fans, impellers on models where they are sold separately, cables, connectors, and guards are all legitimate replacements. On small fans, the economics flip: your time and the risk of collateral damage make the complete fan the better deal.

The decision is not hard if you work the matrix: minor fault plus young fan means repair the part; major fault, old fan, or tiny frame size means replace the fan. Order with a compatibility checklist, not a picture on a website, and run the seven-step procedure with a proper test at the end. Done that way, a replacement part stops being a gamble and becomes exactly what it should be: the cheapest way to give a good fan a second life.

Frequently Asked Questions

Q1: Can I replace just the bearing in a small DC axial fan?

Yes, but only on the right fans. On 120 mm and larger fans with ball bearings, bearing replacement is a practical repair: press the old bearing out, press a matching new one in, re-lubricate, and re-test. On 40-92 mm fan frames with sleeve bearings, the bushing is usually riveted in and the shaft already shows wear, so the fan itself should be replaced. When you do replace a bearing, match the dimensions exactly - a 608ZZ (8x22x7 mm) is not interchangeable with a 8x22x8 mm variant [2] [7].

Q2: How do I know if a replacement fan will fit my device?

Match the mounting hole pitch measured in millimeters - the marketing "size" of a fan is the nominal frame size, but the hole pattern is what actually fits. Then verify voltage, connector type and pinout, current draw, and the speed-signal logic. If the original fan was chosen by an OEM, the safest path is to buy the same model number or an electrically identical cross-reference from the fan manufacturer's datasheet [2].

Q3: Replacing the fan is cheaper than the part - why would I ever repair?

Because part price is not the whole story. If the fan is expensive, hard-to-source, or part of a matched pair, or if the enclosure would need disassembly to reach it anyway, repairing the part can win. That said, the DOE's analysis of motor maintenance economics applies to small fans too: when a repair takes more than about a third of the replacement cost, replacement is the economically sound choice [6].

Q4: I swapped in a new fan and it spins the wrong way. What happened?

You fitted a fan with reversed rotation, or the leads are connected so the controller drives it in reverse. Before you question the fan, check the airflow direction marking on the frame, and compare the rotation arrow with the original. If the model is correct but rotation is still wrong, check whether your device expects a special rotation version - some fans come in CW and CCW variants that look identical from the front [4].

Q5: Can I fix a fan with a melted connector instead of replacing the whole fan?

Usually yes. A melted, deformed, or corroded connector is a wiring problem, not a motor problem. Cut the damaged connector off, re-terminate with the correct connector housing and pinout, and check the pins on the PCB side for heat damage while you are in there. If the board-side connector also melted, inspect the board for scorching before you plug anything in - and check why it overheated in the first place, because a new connector on a still-faulty load will melt again [3] [8].

References

[1] ebm-papst Group. DC Axial Fan Application and Service Guide: Failure Analysis and Field Return Data. Available at: https://www.ebm-papst.com.cn/en/
[2] Sanyo Denki. Sanace DC Fan Series: Bearing Dimensions, Life Data and Technical Specifications. Available at: https://products.sanyodenki.com/en/sanace/
[3] IEEE. IEEE Std 3001.8: Recommended Practice for Conducting Motor Field Tests and Diagnostics. Available at: https://standards.ieee.org/
[4] AMCA International. AMCA Standard 210: Laboratory Methods of Testing Fans for Ratings. Available at: https://amca.org/
[5] ASHRAE. Ventilation and Airflow Handling Best Practices for Equipment Enclosures. Available at: https://www.ashrae.org/
[6] U.S. Department of Energy. Motor Systems Efficiency and Repair-vs-Replace Analysis Resources. Available at: https://www.energy.gov/eere/amo/motor-systems
[7] Sunon. DC Fan Bearing Technology Guide: Sleeve vs Ball Bearing Life and Replacement Guidelines. Available at: https://www.sunon.com/en/
[8] Energy Star. Energy Efficiency Guidance for Electronics Cooling and Enclosure Ventilation. Available at: https://www.energystar.gov/

Zhang Yu AUTHOR
Senior HVAC & EC Fan Applications Engineer
on EC and DC fan engineering, AC-to-EC energy retrofits, AHU modernization and data center cooling. Every article is grounded in real fan data, manufacturer documentation and completed retrofit projects.
View all articles by Zhang Yu →